High resolution height maps

Planning and Development

I’ve been working on loading and saving height maps for terrain lately.  My first attempt at this just used a grayscale image and the engine read the [r, g, b] values from each pixel and placed the corresponding terrain vertex at the appropriate height.  This works fine but it’s not a very efficient use of the image data.  Since the image is grayscale each pixel’s [r, g, b] value is the same number repeated three times.

I don’t care so much about the inefficiency but the lack of resolution was annoying.  What I mean is that in a grayscale image each pixel is somewhere between [0, 0, 0] (ignoring alpha values) and [255, 255, 255].  That means the world’s terrain can only have 256 distinct height values.  This can be scaled arbitrarily so I might have each step set at 0.1 meters, but then the highest point in the game could only ever be 25 meters.  Actually, it would be half of that since the terrain has to be able to account for distances below sea level as well.  Or I might have each step be 2 meters so that I could have towering peaks of 256 meters and abyssal depths of 256 meters, but the terrain itself would jump up and down by increments as high as player characters are tall, so neither of these is ideal.

Since this is quite insufficient for a world that’s at all interesting I have been looking at other options.  My first though was to just add r + g + b to get a range of 768.  Divided in half this gives me a max height of 384 meters.  I could live with this and just accept that Lyridia is a fairly flat place but my terrain step distance would still be 1 meter, and I just don’t think that would look very good.  Again, I could scale this down but then my max height goes down and the world gets pretty flat and boring again.  Plus, with this method a pixel with color [255, 0, 0] represents the same height as another with [128, 127, 0] or another with [0, 255, 0] or another with [2, 0, 253].  With so many colors representing the same ultimate value I knew there had to be a better way to store more resolution in a standard image.

I kept coming back to the number 16.7 million in my head.  That’s the number of possible color combinations for a 24 bit monitor.  It’s 256 x 256 x 256.  With that in mind, I figured there must be a way to get 16.7 million discreet levels in a world terrain and this is (I think) how you do it.

For any pixel, the [r] value has the largest effect.  I thought it would be fun to have a maximum terrain delta of 65,536 meters, so I multiply each [r] value by 256 to get r.  Then each [g] value is left unmodified as g, then each [b] value is divided by 255 to get b.  Now just add r + g + b to get your terrain height.  No need to scale anything as this gives you a massive delta by altering the [r] values but extremely fine gradations by altering the [b] value.  A terrain height represented by [0, 0, 1] is just 0.003922 meters high!  That’s less than a quarter of an inch.  Yet [255, 255, 255] is over 40 miles high!

This may all be incredibly obvious to anyone who has done this type of work before but that’s definitely not me so it was fun and challenging to figure out how to make this work.  The long and the short of it is that I can store height maps for Lyridia as standard .png files with more resolution than I’ll ever need and I’m pretty excited about that.
Editor update

Planning and Development

I’m still working on the world editor.  I’ve made some real strides in the terrain editing functionality.  Now you can save a terrain and it produces a height map that can then be loaded by the world editor.  I’m still trying to work out all the specifics of how to make this work exactly the way I want it to, but I’m sick today and I don’t have the patience to work on it right now, so I’m really just posting a “no update” update.  I guess it’s better than nothing.

White flower

Feature Development, Planning and Development

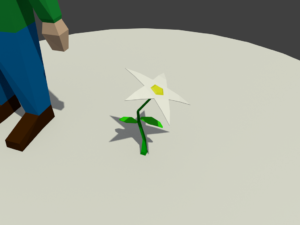
I needed a small break from thinking about the world editor so I made a flower.

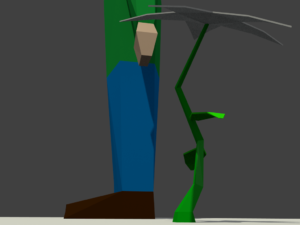
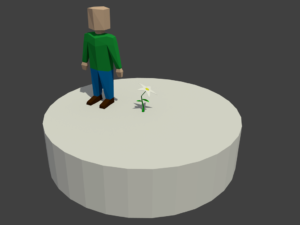
Here it is in all of it’s flowery glory.  It’s 249 triangles with 4 materials.  That’s actually a higher polygon count than I was hoping for, but since the petals are actually solid (not just planes) it bumped up the count a bit.  I can go back and make the petals into planes later if it becomes an issue, but I doubt it will.  Here’s a little closer shot so you can see all of the magnificent details.And here’s a shot where you can pretend you are a bug or some very small animal.  
I found Neverwinter a few days ago.  As with any game where you make fairly fast progress at the beginning it’s been really engrossing.  Unfortunately it’s eaten into the very limited amount of time I have to work on Lyridia, but I’m calling it market research because Neverwinter is free-to-play so it’s interesting to see how a real studio makes money from this business model.  It’s also a very pretty game and has inspired me to think about the style I want Lyridia to be, from the visuals to the audio to the general feel of the game.  I’m trying to work on the most basic bones of a game engine before I invest too much into what the final game will look like.  Once I get the base system working I have someone in mind I would like to collaborate with to work out the art style and much of the gameplay style as well, so hopefully I’ll be to that point by some time this summer.

Editor update – terrain

Planning and Development

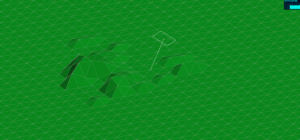
I’m continuing to improve the terrain editing functionality of the scene editor.  Now when you click on a terrain object instead of changing the emissive value so that the terrain glows, a black wireframe is laid over the terrain object itself.  Then, if you press ‘e’ to enter edit mode, the wireframe turns light gray, as in the picture:

This is a better way to do things because it doesn’t mess with the color of the terrain as it is being edited.  When the terrain was glowing a bright green, it made it difficult to see the changes being made.  Now you can tell what you are doing, and the wireframe really helps.  I also change the camera to orthographic.  This just makes it easier to navigate and get a clearer picture of the whole scene.  The white square with line in the image is a directional light helper.

Right now I’m running into a little trouble with saving the scene file.  For simplicity’s sake I was trying to just save the ‘y’ value of every vertex in the terrain.  This isn’t working correctly and I think it’s because of an inherent limitation in the amount of data I can send through an HTTP POST.  I may have to write the scene file data into a pop up <div> then copy and paste that into a scene file on the server.  This isn’t very efficient so I’ll need to improve the process eventually, but it may be an ok solution for now.

Editor update – terrain

Planning and Development

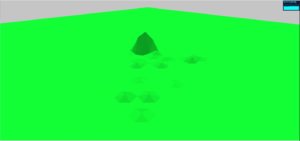
Check this out:That’s a genuinely terrible excuse for a terrain but it was generated completely in the editor.  For now right clicking on a terrain while in edit mode raises vertex closest to your click by 2 units.  This obviously needs to be expanded to allow for arbitrary up and down movement, but it’s a start.  The terrain object’s vertex and normal arrays have to be recomputed every time a vertex is moved, but this works.  After the controls themselves are improved a little, I’ll need to write a way to export this terrain to a height map.  Then I’ll have to make a way to import those height maps back into the editor.  Lots to do.

Editor update

Planning and Development

I’ve been working on terrain editing tonight and it’s been a little slow but I’m making progress.  Now when you select a terrain object you can hit ‘e’ to enter edit mode.  This changes the emissive color of the object so you can tell you are in edit mode.  Then, when you right click anywhere on the terrain it picks the vertex closest to where you clicked and places a little yellow sphere there.  The sphere is, of course, just a placeholder for future functionality.  Eventually I will be able to move the selected vertex up and down along the y axis.  This is actually a pretty small step to code, I just don’t feel like it tonight.

This isn’t anything groundbreaking but I thought somebody might be interested in how to select the closest vertex on a mesh.

First, you need to get an intersection point.  There are plenty of resources out there on how to do this, just search for raycaster, and specifically the .setFromCamera() method.  Anyway, once you have your intersection object it tells you some interesting things.  First of all it includes the intersection point, which is obviously necessary.  It also has the intersection face.  The face is comprised of three elements; a, b, and c.  These are the indices of the three vertices of the triangle intersected.  So to get the actual Vector3s for these three points you can do something like this:

var a = terrain.geometry.vertices[intersections[0].face.a];
var b = terrain.geometry.vertices[intersections[0].face.b];
var c = terrain.geometry.vertices[intersections[0].face.c];

Now you have the intersection point as a Vector3 and the three points of the intersected triangle, also as Vector3s.  Vector3 has a convenient method called .distanceTo() that returns, you guess it, the distance from one Vector3 to another.  So all you need to do is find out which of a, b, and c is closest to your intersection point.  I used Math.min() but there are plenty of ways to do this.  Once you know the closest one, you can do whatever you want with it.  As I said previously, I placed a little yellow sphere on the closest vertex for now, but the eventual goal is to move the vertex up and down to shape the terrain.

Maybe this will be mildly useful to someone down the road.  If you have any questions about this leave a comment and I’ll do my best to respond.

Editor update

Planning and Development

Translate, rotate, and scale are working for all objects.  Only one object can be selected at a time, so if you have an object selected and select another, the first is automatically deselected.  Saving and loading a scene with translated, rotated, and scaled objects is working.  I realize these are small steps, but they are definitely steps in the right direction.

Next I need to get some simple terrain editing in place.  The terrain is a selectable object just like everything else right now but that needs to change.  I’ll have to have special controls for it.  Initially I want to be able to select a vertex in the terrain and move it up or down.  Eventually I want to be able to select a vertex and have a simple proportional editor that moves adjacent vertices, well, proportionally.

Before that I might want to add some basic camera controls.  It would be nice to be able to swap back and forth between perspective and orthographic views, and it would be nice to be able to look down at the scene from above with a single keystroke.  We’ll see what I feel like working on tomorrow, I suppose.

Editor update

Planning and Development

Now when you select an asset and then translate (‘g’) or rotate (‘r’) and then select an axis (‘x’, ‘y’, or ‘z’) the action happens when you move the mouse left or right.  So if you want to move something along the x axis you select it, press ‘g’ then ‘x’ and move the mouse.  Also you can save a map and load a map.  It’s saved in JSON format so it’s pretty easy to work with in the actual editor and the PHP that actually writes the file.  Still lots of work to do but I’m making real progress toward some basic functionality.

Editor update

Planning and Development

I’ve begun writing my world editor.  I can see that this is going to a be a very big, very important part of this whole game project.  So far you can add a terrain with a button, although the terrain is just a flat subdivided plane, and you can add a test asset, which is this weird looking cube thing.  Blender is the only 3D authoring tool I’ve used much so taking a cue from its controls you can right click on an asset to select it, and it glows red.  You can then right click anywhere off of an asset to deselect.  This isn’t working 100% correctly and will be improved eventually, but it’s ok for now.  If an asset is selected, you can press ‘g’ to enter translate mode, then press ‘x’ to move the asset along the X axis, or ‘z’ to move the asset along the Z axis.  Other than the THREE.js orbit controls, that’s it so far.

The list of things to do is too large to even start it here, so I won’t bother.  Once I can load a scene in the world editor, save it, then load it in the game I will feel like it’s a real tool, so that’s my focus for now.  When that very basic functionality is working, I’ll start adding features to the editor and hopefully see some real progress in the game world at that point.

Progress report, 2018.03.06

Planning and Development

So far the rewrite in THREE.js is going fairly smoothly.  I have a very simple random terrain generator and a character model that loads.  A simple follow camera follows the character around and the character stays on top of the ground thanks to a raycaster.  The Penrith Farmhouse is also loaded and you can walk around (and through) it.  I also have fog set up so that anything past a certain distance just fades into the distance as you walk around.  This is most of what I had set up in the BabylonJS implementation, but without as much content in the world and without collision detection (other than the ground).

Some things I’m excited about:

  • Performance is still good at this point, even on my very low end testing PC.  If I shrink the display down to 800 x 600 I can get 60 FPS.  This is good news because I would really like the low end hardware requirements for the game to be very low.
  • Lighting is going to be fun in THREE.js.  I didn’t play around with the lighting much in BabylonJS but I can totally see individual lamp posts actually casting light, and maybe even using shadows for players with beefier hardware.
  • No twitching.  One of the things that really bothered me about the built-in collision detection system in BabylonJS is that right from the start it made my scenes very jumpy.  For instance, just walking around on the terrain made the camera jittery.  It wasn’t a huge deal and it was probably something I was doing wrong anyway, but it made the game feel manic and made me nervous that it happened so easily when using that engine.

At this point I need to address the first drawback of using THREE.js as a game engine which is there are no native scene creation utilities.  I can’t just model a whole scene in Blender then import it like I can with BabylonJS.  Honestly, though, even if I could I don’t think that’s a great process.  If this is going to be a real game, it needs a real scene editor so that I can see the changes I want to make as they appear in the engine, not in another piece of software.  That being said I will still make heavy use of Blender to create assets for Lyridia, I just need a tool to import those assets into a scene and move, rotate, and scale them in a way that is efficient for THREE.js.

So that will be my project for the next several days, or possibly a few weeks.  I’ll need the ability to load and save terrains with height map images, import and position, rotate, and scale assets, and save scene files.  If I can get all that working then I’ll start looking at some more advanced options like tweaking materials, adding lights, etc., etc., etc.